Note: I made this motor puzzle (and wrote this article) in the 1990’s and recently had a chance for my grandson to try it. Unfortunately, by the time my wife got her camera he had it almost taken apart. I used all these mechanical puzzles in the 1990’s when we didn’t all have cell phones with cameras in our pocket.
Lucas and the Lawn Mower engine puzzle:
https://www.youtube.com/edit?o=U&video_id=127a6qyb6z4
The kids in my summer class loved to take apart VCR’s, record players and typewriters, but I didn’t want them to come away with the idea that you only took things apart. I began looking for simple mechanical devices kids could take apart, see how they worked, and then put back together. Then the obvious occurred to me: how alike puzzles and mechanical things are. Many people like puzzles but are intimidated by machinery. I had never liked puzzles, yet I liked to work on machinery. Ironic. Weren’t they really similar? Why not use real mechanical objects as puzzles to expose kids to simple machinery? Maybe then they would be less intimidated by leaky faucets and machinery when they were older. Their puzzle knowledge could have practical applications.
The Lawn mower engine
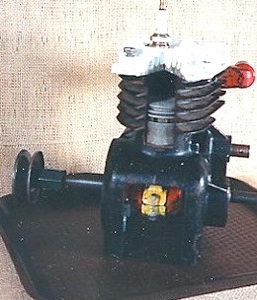
 At the Smithsonian Institution I had seen a motor cycle engine with part of the engine block and cylinder head cutaway so the piston, crankshaft and valves could be seen. I thought it might be interesting to take this exhibit a step further by having an engine kids could actually take apart an put back together. I found an engine, disassembled it and steam cleaned the parts at a car wash. I cut a wedge shaped piece from the engine block to make the piston visible and removed a matching piece from the cylinder head. I removed another piece from the lower engine block to expose the crankshaft., painted some of the parts and reassembled the engine.
My son’s teacher found five interested kids and we went to the cafeteria to test this creation. They really liked to take it apart but when it came to putting it back together they weren’t very interested. I found myself getting upset because they were losing pieces and didn’t want to listen when I expounded on how a internal combustion engine works.
I did this same thing a couple times with different kids and each time came away feeling mildly irritated at the kids and being worried about losing pieces. I thought about this for a while and realized I wanted the kids to completely take and engine apart, put it back together, and understand how it works all in hour or so. This was obviously, or I guess not so obviously, too much too expect.
My new plan was to simplify the engine reducing it to basic parts and concentrate on the kid’s interests. I put away the carburetor, the ignition system, the flywheel, the pan and lots of nuts and bolts. Then I didn’t worry about losing parts. I forgot my speech on how an internal combustion engine works. Maybe I’ll show how the valves pop up, or name a part or two but mostly I let them take it apart and put it back together and answer questions.
This motor is now part of a puzzle collection that I take to schools and in any group of kids there will be several who want to take it apart and put it back together. It familiarizes children with motor pieces and plants the seed that motors are just 3-dimensional puzzles not some unfathomable mystery. 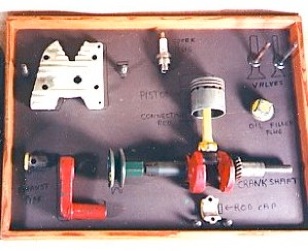
The Faucet
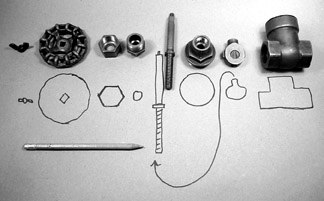
At the hardware store I choose an eight piece brass gate valve, or faucet, about 8” tall. Kids like the feel and size of it. Smaller faucets don’t have the same attraction. They like to turn the handle and watch the gate inside the faucet open and close. I took this faucet apart and traced each piece, in the order it came apart, on a piece of felt. The activity for children to take the faucet apart, match the pieces to the proper shapes on the felt and then put it back together. After they could reassemble the faucet using the felt, I had them put the felt away and try again still arranging the pieces in order as they came apart. This is a good lesson when taking anything apart: arrange the parts in order as they come apart. After kids can assemble the facet without the felt I’ll sometimes challenged them to mix the pieces up and try again. If they need help they can always go back to the felt.
The most interesting reaction to the faucet puzzle, however, came from a teacher. I had volunteered to take my puzzle collection, some folk toys, and some science equipment to a friends classroom. I spread everything out and let the kids choose their own work. The faucet was on one table and the teacher asked what you did with it. First I showed how the gate opens when the handle is turned and then I told her it was to take apart and put together. So she did. She was excited and exclaimed to the kids around her “look at this, see how it works!” She was lost in the mechanics of a faucet. The principal came in. Julie, the teacher, said, “Rob come over here and see this.” Rob had other things on his mind and wasn’t really interested but Julie made him come over and listen to her explain how a faucet worked. While we don’t all get that excited about faucets, by merely taking apart and reassembling the faucet Julie was able to make a small part of the mechanical world less intimidating.
The Door Lock
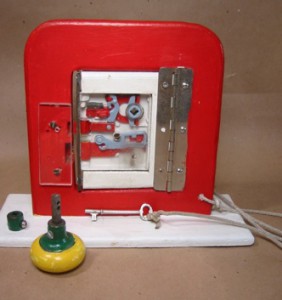
At a garage sale I found a flat square door lock from an old house. I cleaned it up and replaced one side with a piece of Plexiglas so the inner lock mechanism was visible. It was hard not to appreciate how the parts fit together and worked. What happens when the door knob is turned and released? How does this open the door? How does the lock part work? Why will one key work and not another?
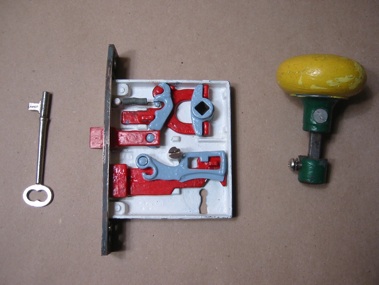 Back in class I set the lock on the table with some other science things to see if anyone was interested. To my surprise no one was. I didn’t understand why until I realized kids didn’t see the individual lock pieces. It was all one unit to them. I took the lock home and painted the inside white and the working pieces contrasting colors. Then I set the lock in a mini-door frame. What a difference! Everyone was interested and amazed. Parents would ohs and ahs and the kids would sit down and work with it till the lock opened and they could understand how it worked. One kid asked if he could pick the lock. I provided a large paper clip and a pair of needle nose pliers and picking the lock became a favorite activity.
The Little Hammer with Nesting Screwdrivers
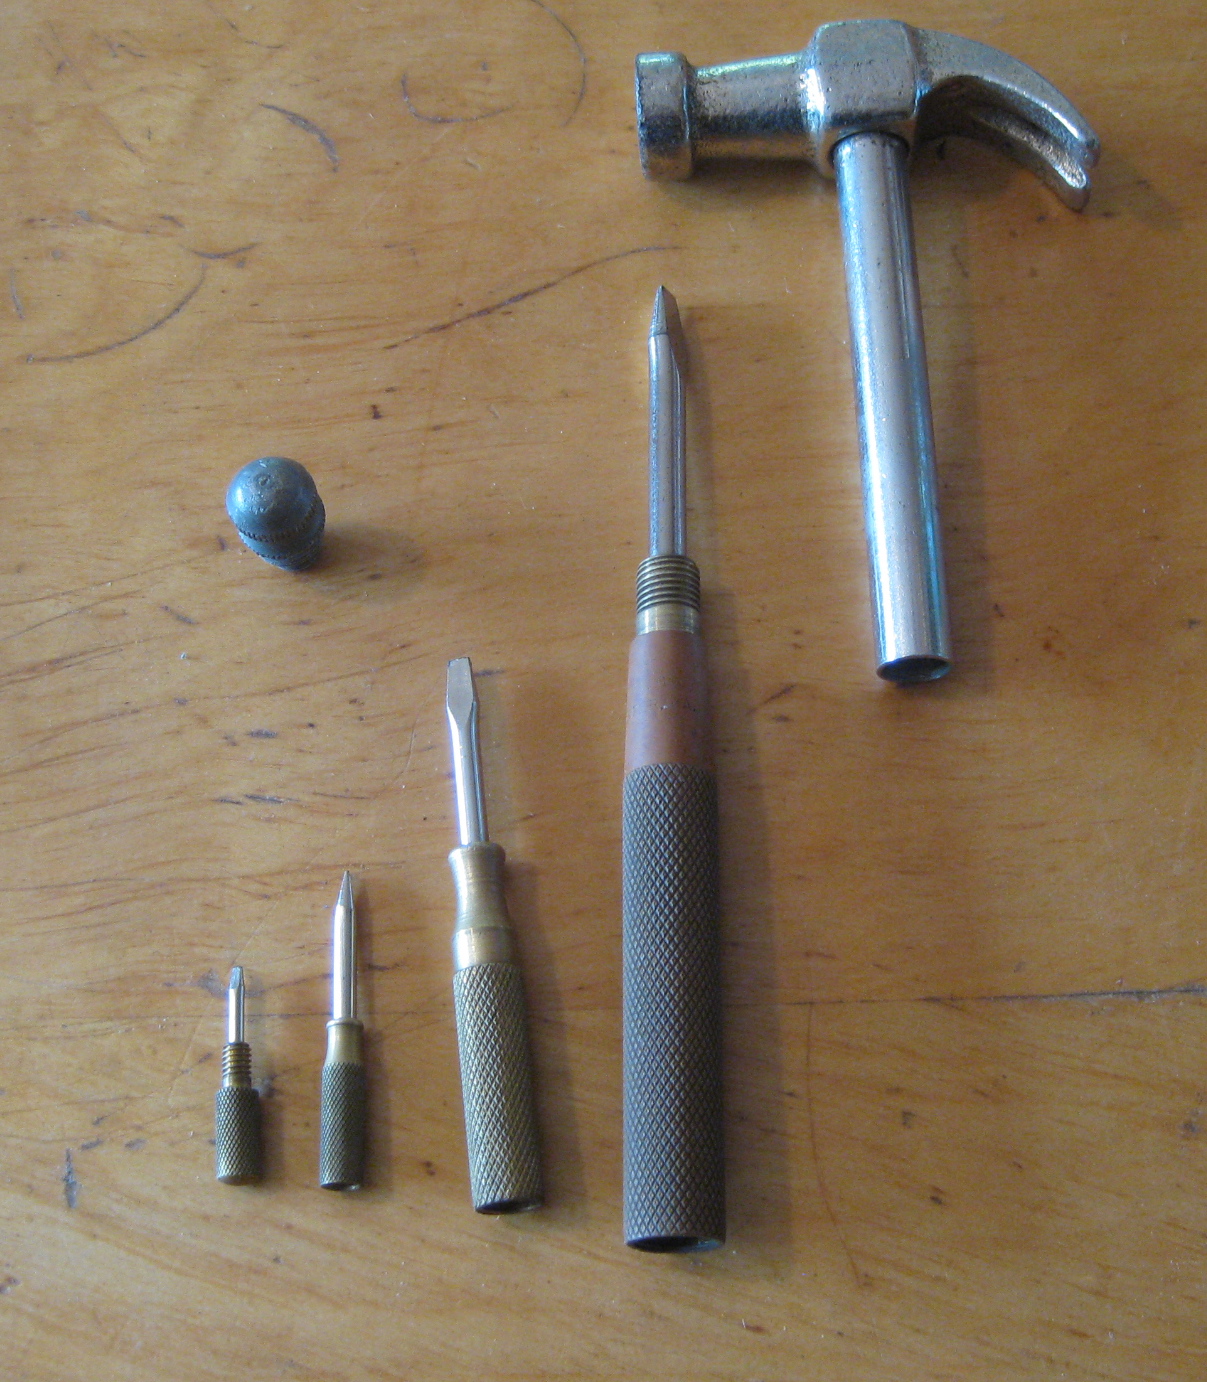
I saw a box of these little hammers at the hardware store and it reminded me that my father had given me one like it when I was young. I bought one for my own kids and they proceeded to take it apart and put it back together so many times I took it to my preschool shop class.
For younger kids I’ll take the hammer completely apart, laying the parts in a row, and reassemble it, working backwards, last piece first and first piece last. Laying each piece in order, in a row, is a habit that will keep parts organized when attempting more difficult projects like the faucet and the flashlight. Kids will often take the little hammer apart and put it back together several times. They especially like to show off reassembling it for Mom or Dad.
The Flashlight
 Materials

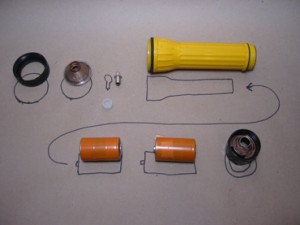
• A good quality flashlight that comes apart at both ends. It should have a plastic, not a glass, lens.
• Batteries for the flashlight.
• A piece of light-colored cloth (felt or canvas) big enough to hold all the flashlight pieces laid out in a row.
• A small piece of sandpaper (220 grit) to lightly sand the ends of the batteries and/or contacts.
What Kids Do
The activity is for kids to take the flashlight apart, placing each piece on its corresponding shape on the cloth. Then the job is to reassemble the flashlight. The test is, does it work? Common mistakes are putting the batteries in backwards, not having the bulb in properly and not having the threads together straight or tight.
 As an added activity you can get a battery checker (electronics supply store) and have children make sure the batteries are OK before assembling the flashlight.