PUZZLES I: Using Precut Puzzle Blanks
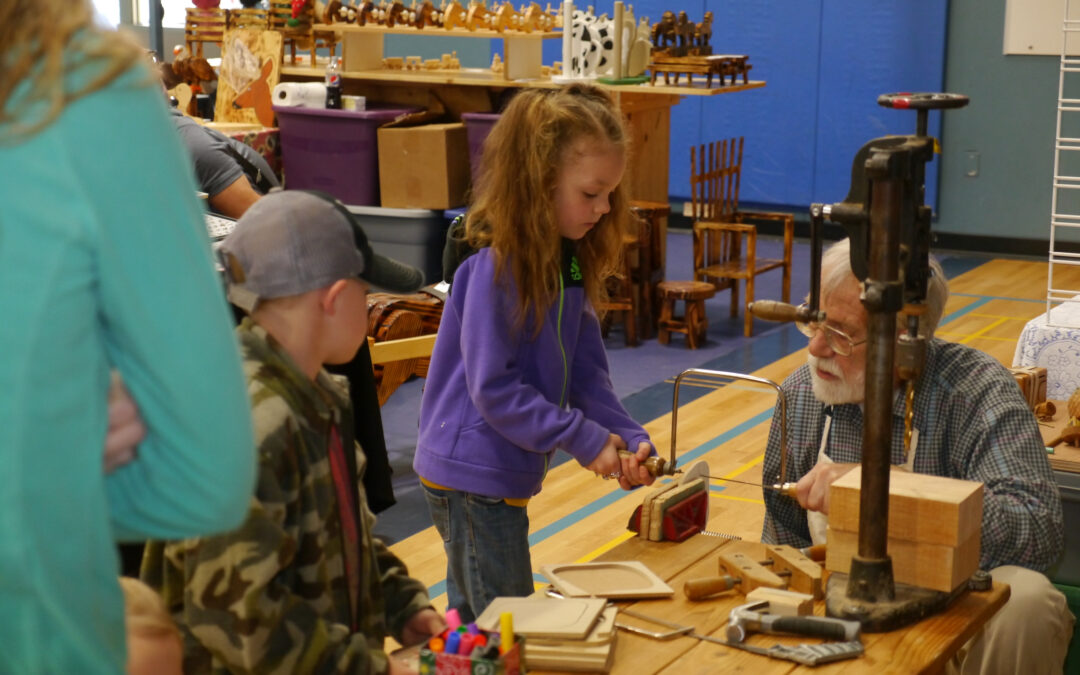
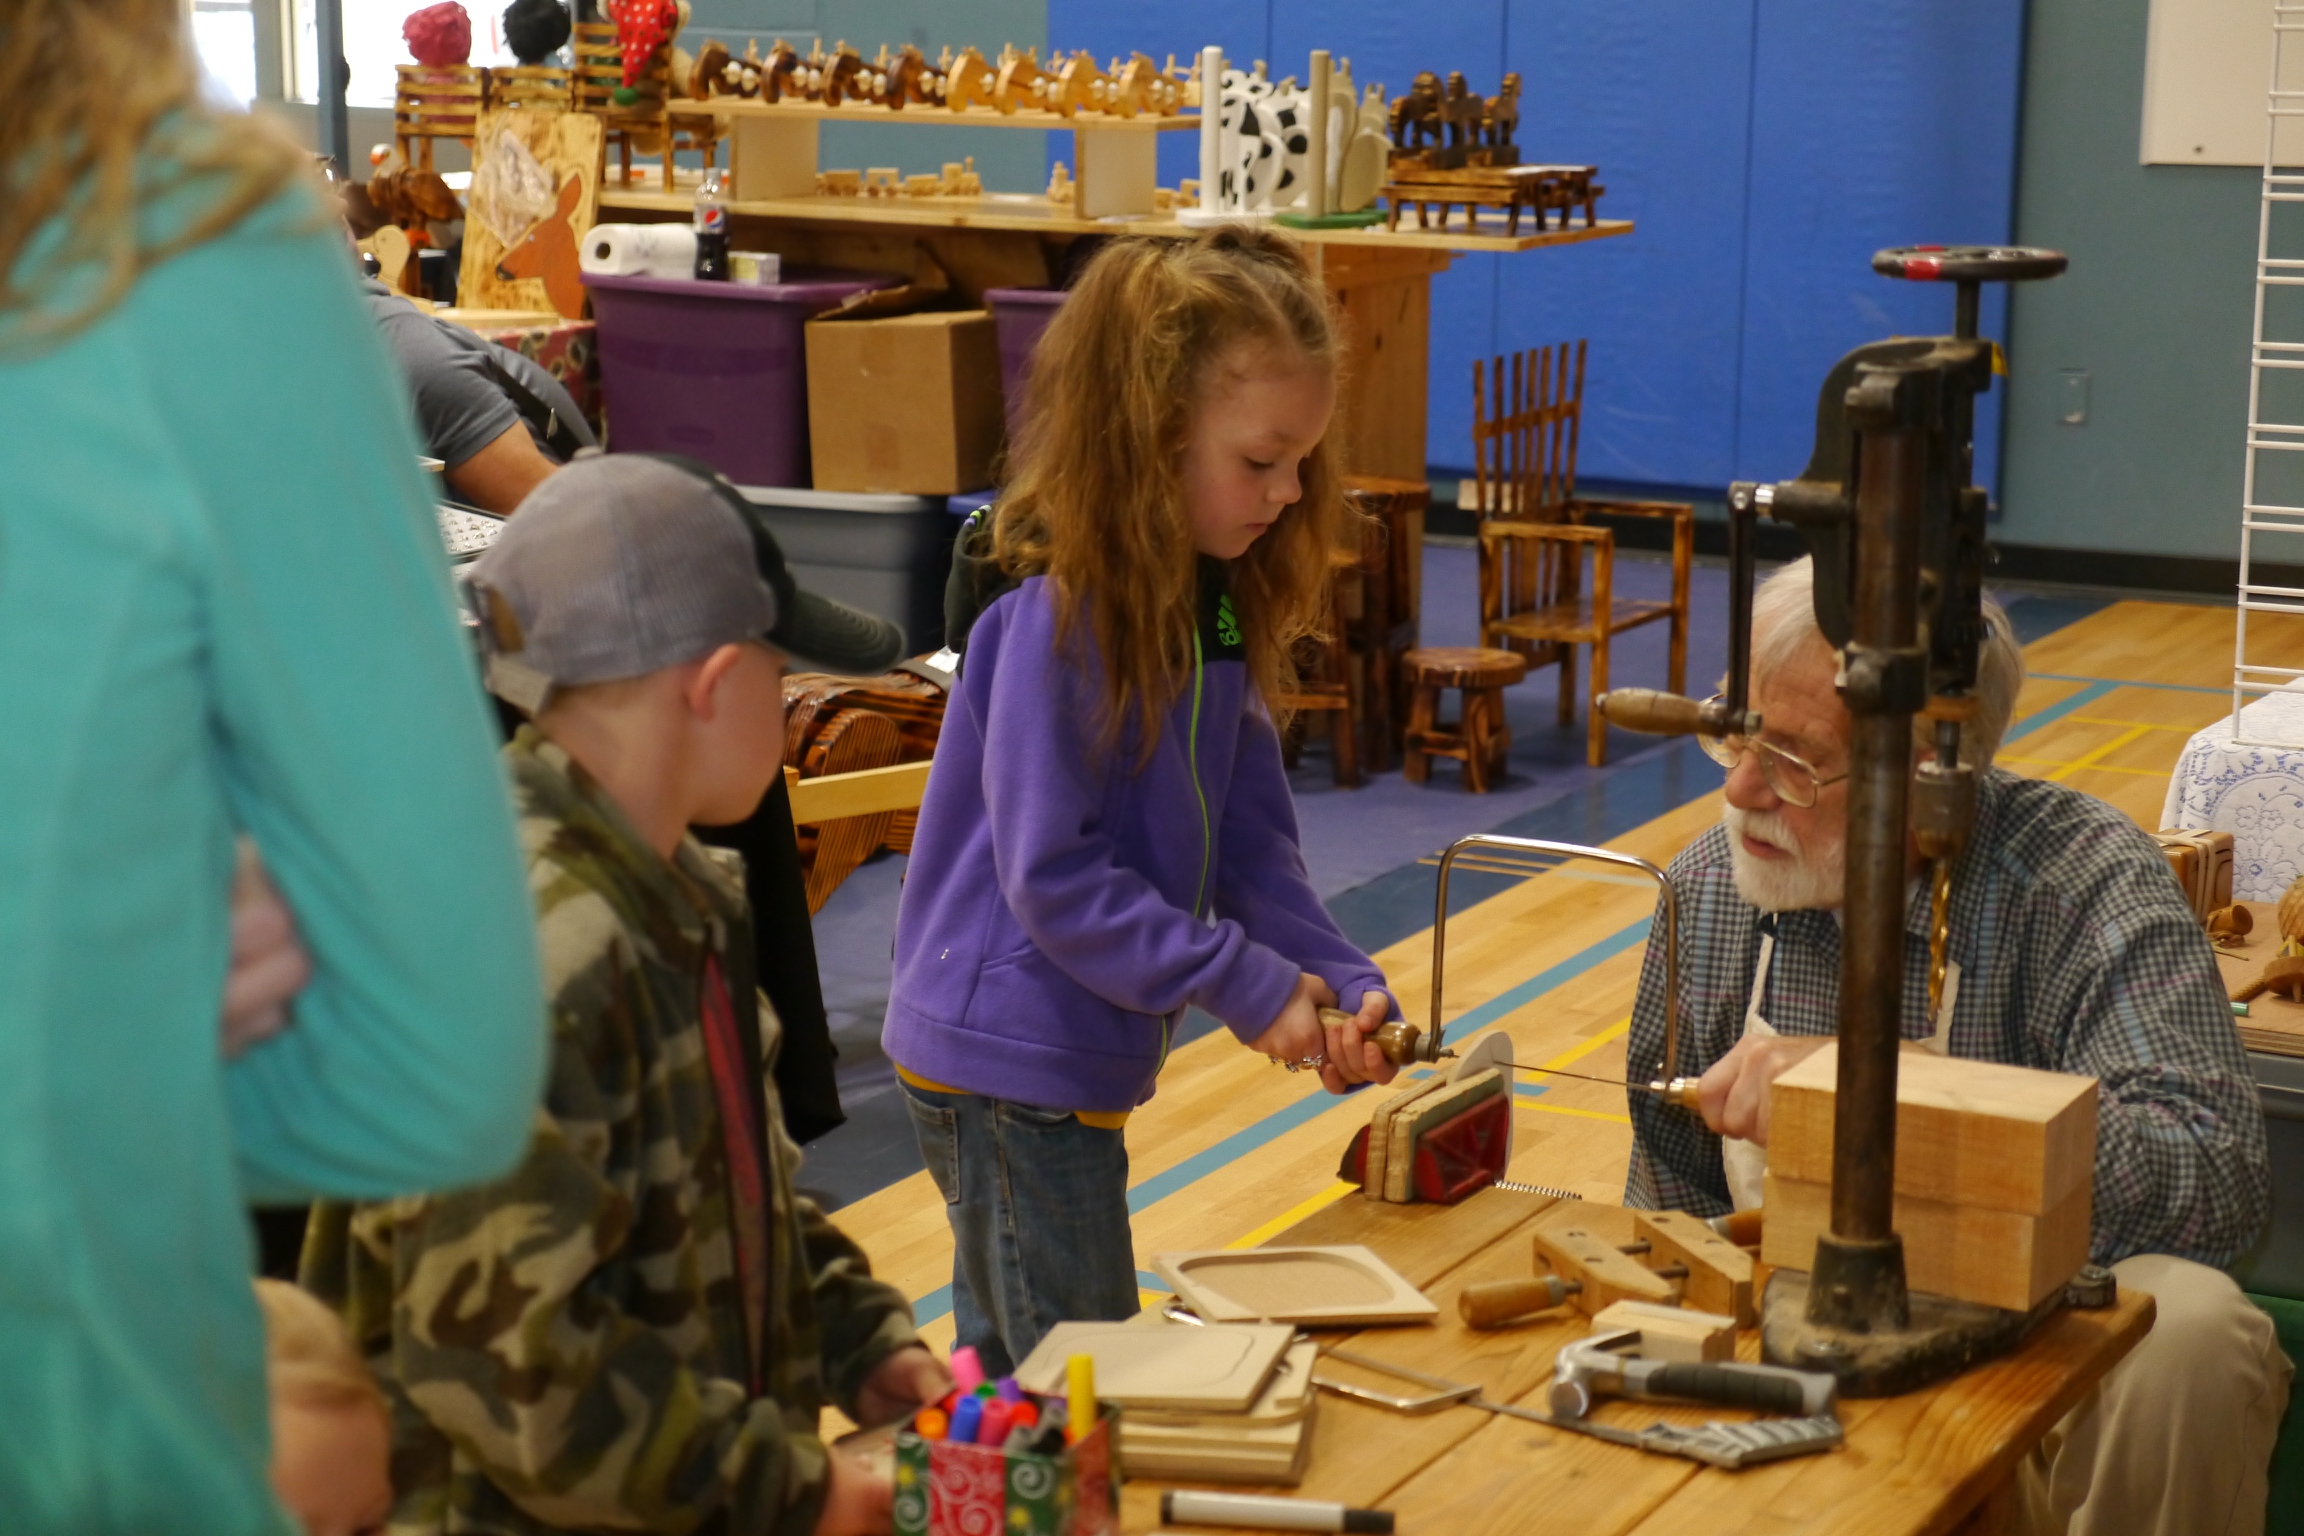
For younger kids who would have difficulty using a coping saw, I make what I call puzzle blanks. These blanks are just a plywood square with the center section cut out in one piece. The kids’ job is to draw a picture on this center section, and then cut it into pieces with a coping saw thus creating the puzzle. I did this project often with five-year-olds at a Montessori school. Older kids like to make puzzles too, but I have them make their own blanks using a coping saw. It’s a good coping saw project for beginners because it’s not necessary to precisely follow a line.
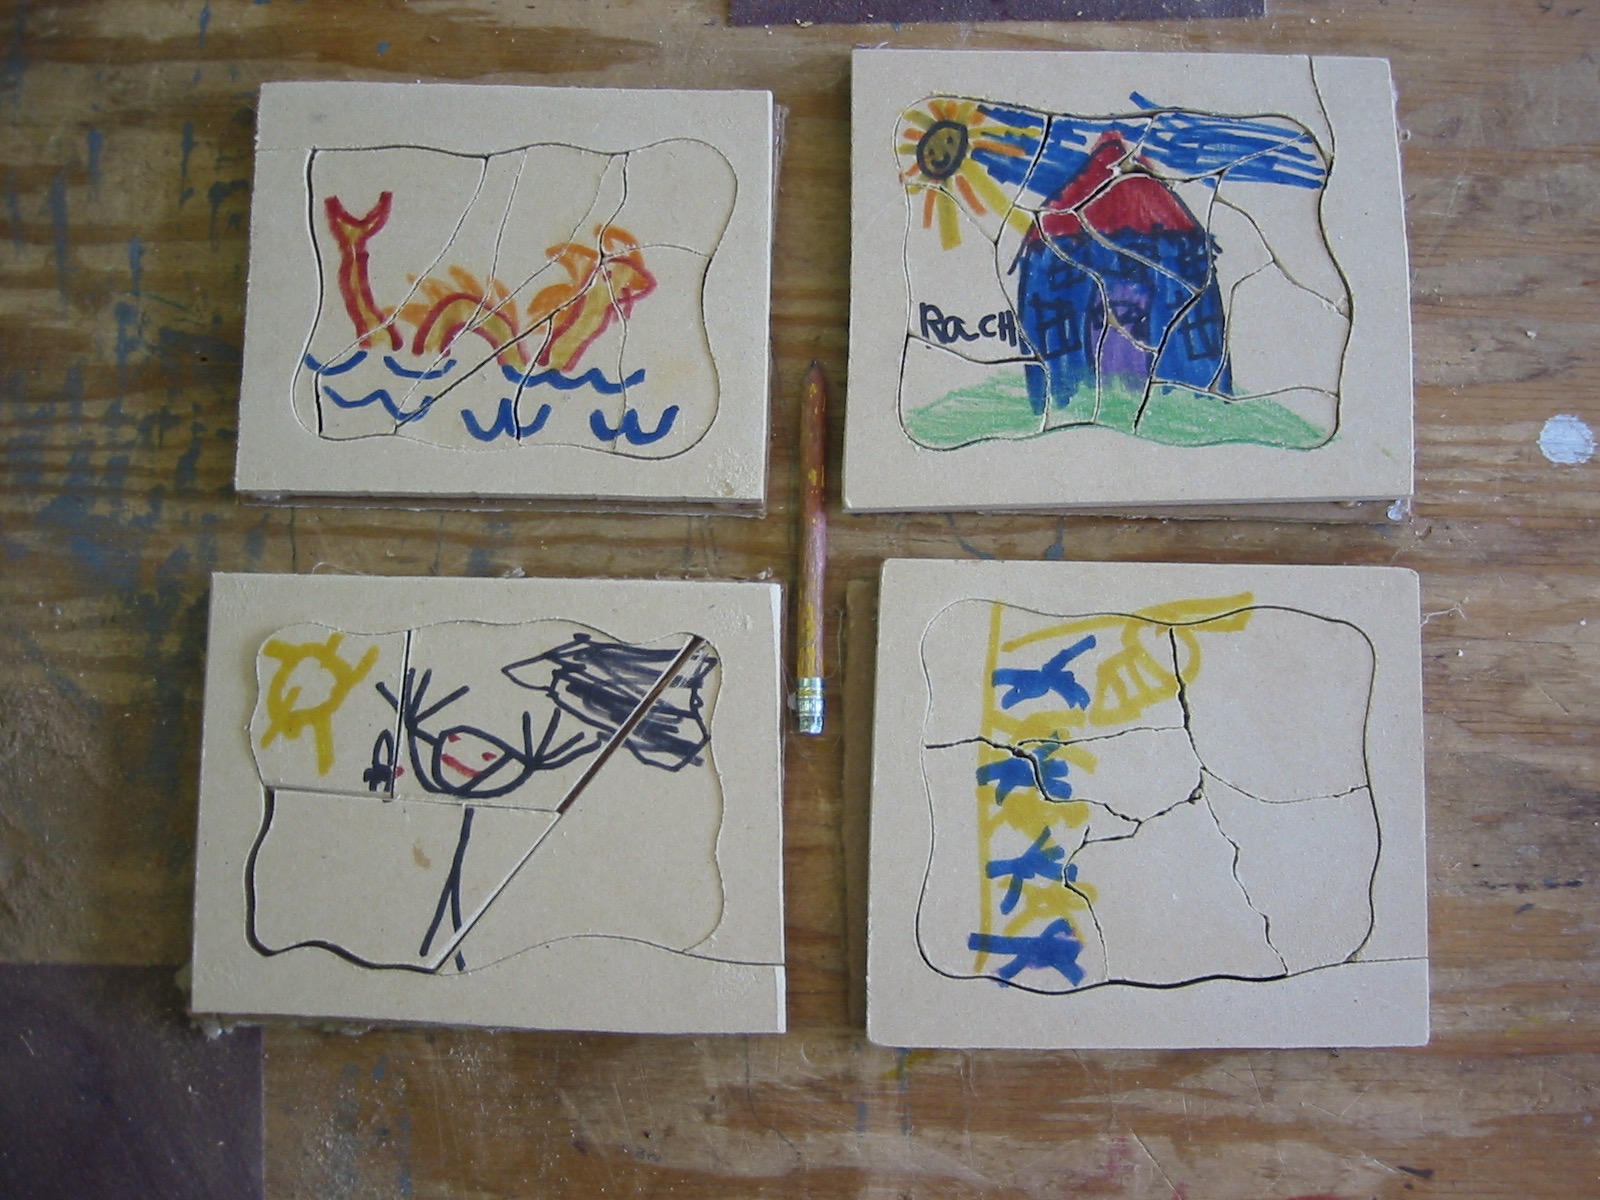
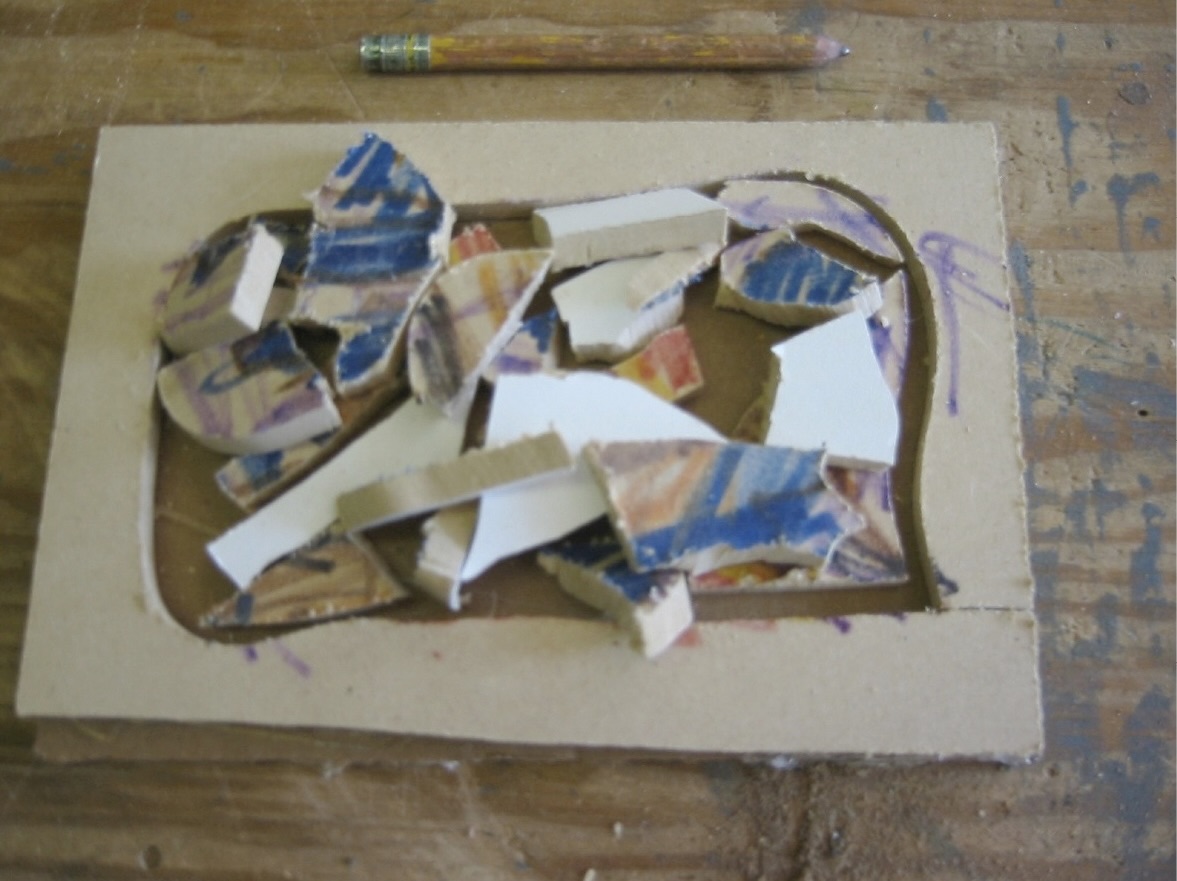
A “puzzle blank” is made by cutting the center out of a small square of plywood.
Adult Preparation
A parent, teacher, or volunteer needs to make the puzzle blanks for younger kids.
Tools for the adult prep
• Mat knife or a sharp knife.
• Eye protection.
• A vise makes it a lot easier if you are going to cut the blanks by hand.
• Coping saw, band saw, a tabletop jigsaw, or saber saw for cutting the puzzle blanks.
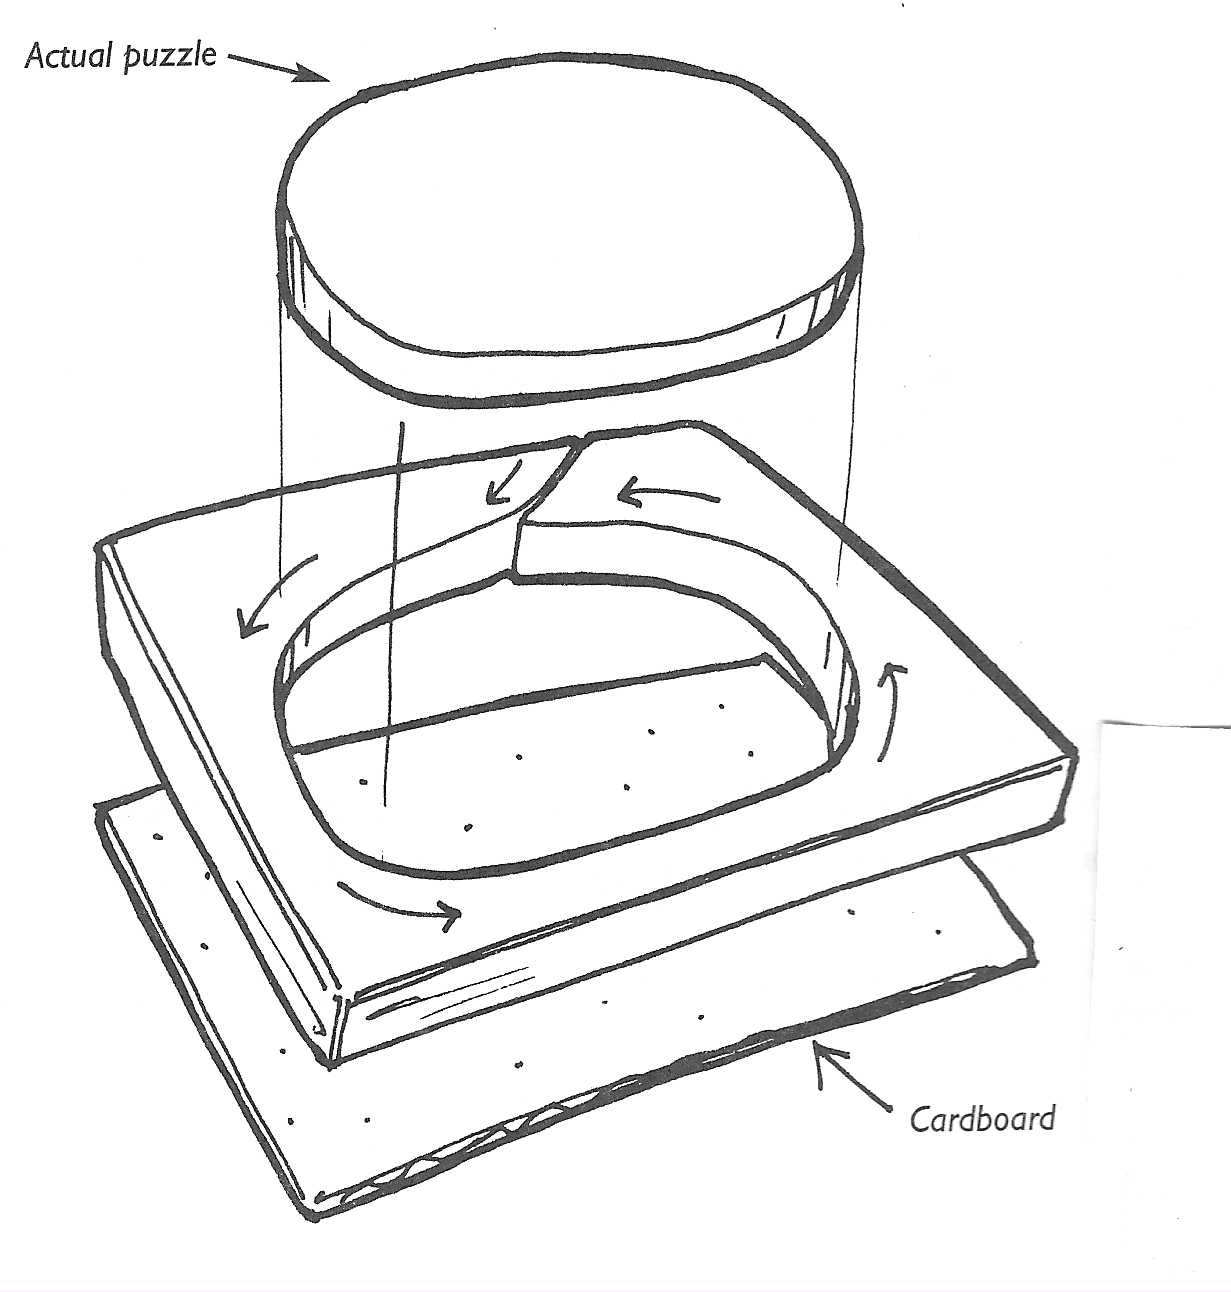
• Jack’s special two handed coping saw below. It’s just a second handle added to a regular coping saw and it makes it easier to help kids straighten out their cuts.
special two handled coping saw.
Materials
• A small piece of cardboard to cover the back of each puzzle.
• 6″ X 6″ squares of 1/4” plywood with a smooth finish.
Adult preparation
1. If you only need a few blanks, cut them with a coping saw. If you need a stack of blanks you’ll need help from a volunteer woodworker with a band saw, tabletop jigsaw, or a hand-held saber saw. First cut out 6″ X 6″ (approximately) squares.
2. Once the squares are cut out, go back and cut out the center of each square as show above. This will be the actual puzzle––the piece the kids will cut into pieces.
3. Finally cut a piece of cardboard to fit the bottom of each puzzle blank. You can use a mat knife or scissors to cut the cardboard. Safety Note: Mat knives are dangerous. Don’t let kids use them. Every carpenter I know has sliced him/herself at least once using a mat knife.
Kids: Making the Puzzle
Tools
• A two handled copings saw is nice. Kids have trouble keeping the cut square to the wood by themselves.
• Markers.
• Vise.
• Eye protection.
• Low-temp hot glue gun and glue sticks.
Materials
• 6″ X 6″ piece of 1/4” pressboard (or plywood) with a smooth surface for each project.
• 6″ X 6″ piece of cardboard for backing each puzzle.
Construction
1. Draw a picture on the puzzle blank with felt pens.
2. Hot glue the outside of the puzzle blank to the cardboard. Four drops of glue, one in each corner, is usually enough.
3. Cut the picture into pieces to make the puzzle. The first time I tried this project, several kids cut their picture into so many tiny pieces they were unable to put them back together. Now I suggest cutting the puzzle into two pieces and then cutting each of those pieces into two more pieces. After they’ve made a four-piece puzzle, they can test it and see if they want to make a few more pieces.80
PUZZLES II: Kids Cut Their Own Blanks
Tools
• Handsaw.
• Coping saw.
• Sandpaper.
• Scissors to cut cardboard.
• Vise.
• Eye protection.
• Keyhole saw to cut cardboard in case scissors don’t work.
• Low-temperature hot glue gun and glue sticks.
Materials
• Small pieces of 1/4” plywood with a smooth finish.
• Cardboard to form the back of the puzzle. Get thin cardboard or heavy paper that canbe cut with scissors.
• Markers
Construction
1. Cut a square (any shape really) for the puzzle from the plywood.
2. Draw a circle in the center of this square (the actual puzzle) and cut it out with a coping saw.
3. Hot glue cardboard to the back of the piece that frames the puzzle. Four drops of glue, one in each corner, is usually enough.
4. Draw a picture on the center circle with markers and then cut it into pieces, but not too many.
Sometimes kids go overboard on the number of pieces.
\