
A Dad sign with nail lettering.
Making signs with nail lettering was one of those projects that didn’t work well until I figured out how to make it easier. Kids liked the idea of making a nail sign (they love to make presents) but they had difficulty keeping the nails straight, at a consistent height, and spaced satisfactorily. Often the sign was not recognizable. If I helped with the initial lettering and had children use a spacer, quality improved somewhat, but still they kept knocking over nails they had already placed. Success was not what I’d hoped. I realized a Jig would ensure success, so I made jigs for the words “Mom” and “Dad.”
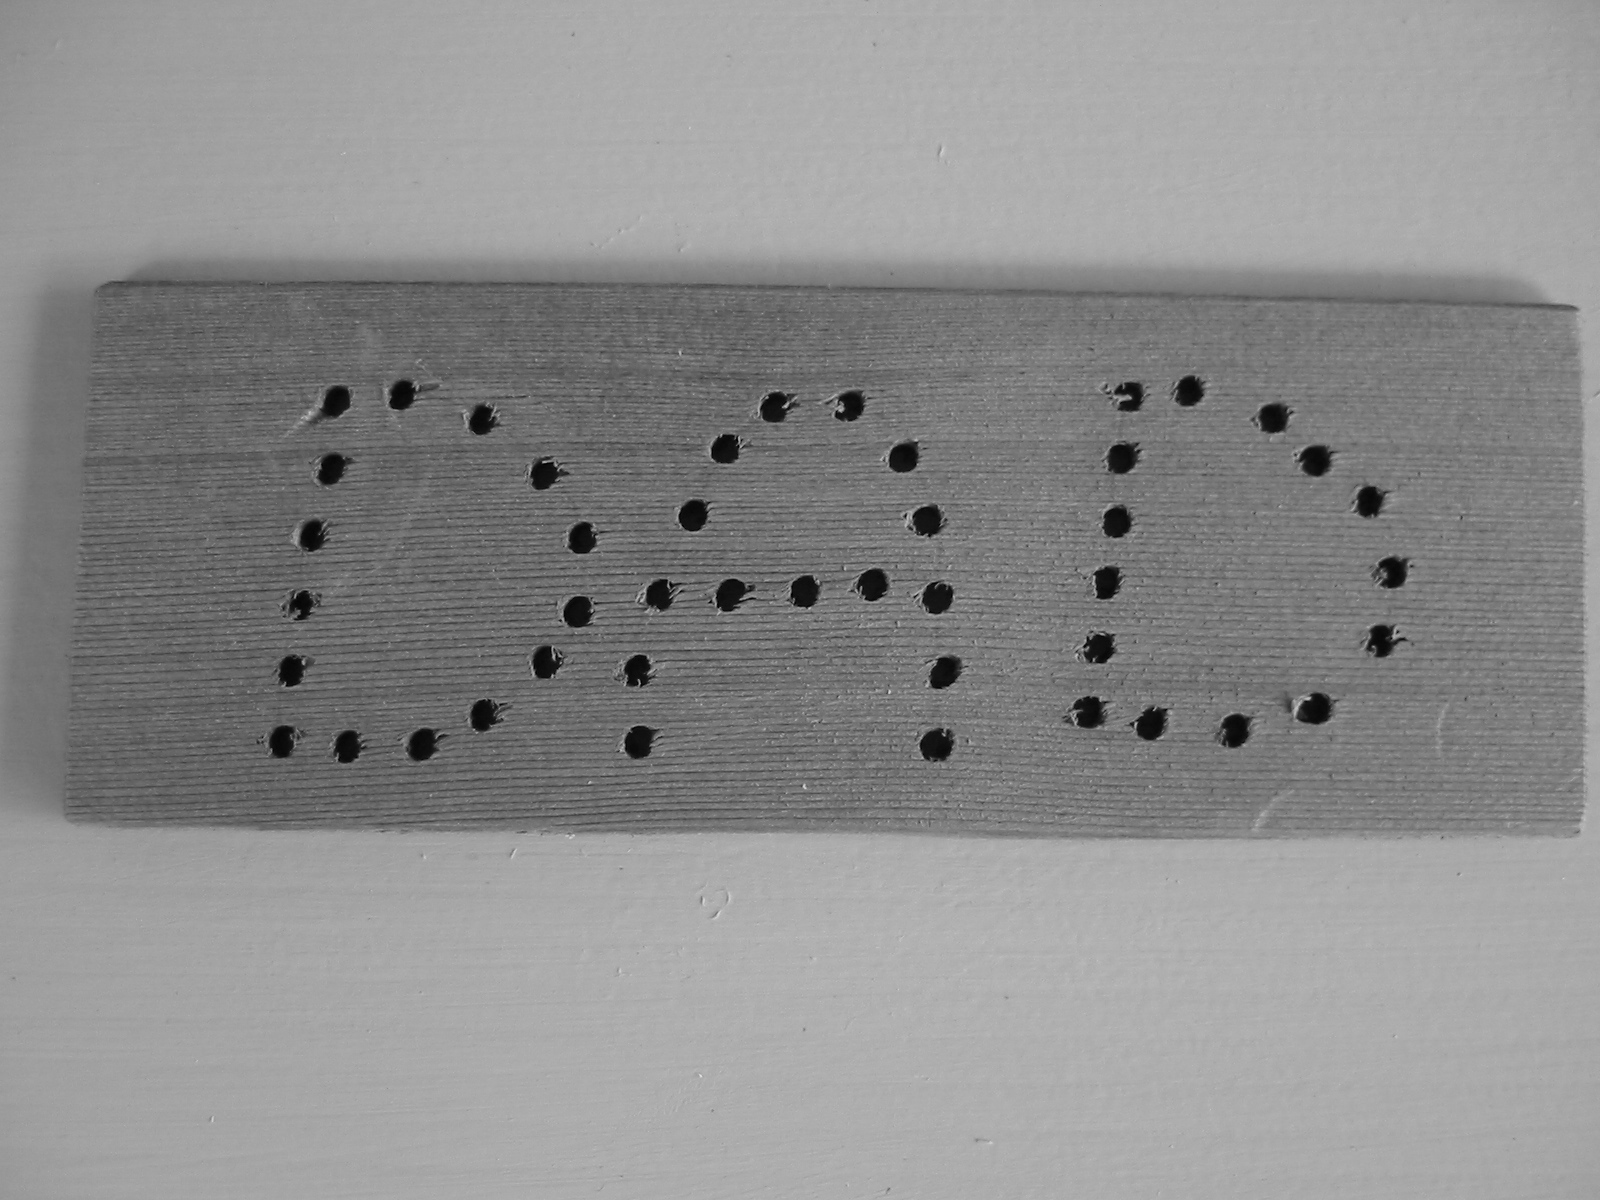
This jig is just a plywood board (built by a teacher, parent, or volunteer) with holes instead of nails. Children use the jigs by pounding finish nails (with small heads) through the holes. The pattern is then pried off (by an adult) leaving the word outlined in nails. The holes space the nails, keep them the same height and keep them straight. Since it was impractical to have jigs for every child’s name I encourage children to make presents for mom and dad.
Adult Preparation
A parent, teacher, or volunteer makes the jig.
Tools
• Drill press or hand drill.
- Tape measure.
- 1″ drill bit.
- Square.
- Eye protection.
Materials
- A piece of 3/4″ plywood about 3/” X 8″
Jig Construction
- Draw the lettering in pencil on the plywood.
- Lay out the hole positions. There should be about 3/16″ from the edge of one hole to the edge of the next.
- Drill 1/8″ holes at each marked position. A drill press will keep all the holes straight but a hand drill will also work.
Kids: Making the Sign With Nail Lettering
Tools
- Hammer.
- Two medium-sized screwdrivers.
Materials
- A piece of 3/4″ plywood a bit larger than the pattern.
- 1 1/4″ finish nails. Use finish nails (small heads) only, so the jig can be pried off over the top of the nails.
- Mineral oil or paint for decoration.

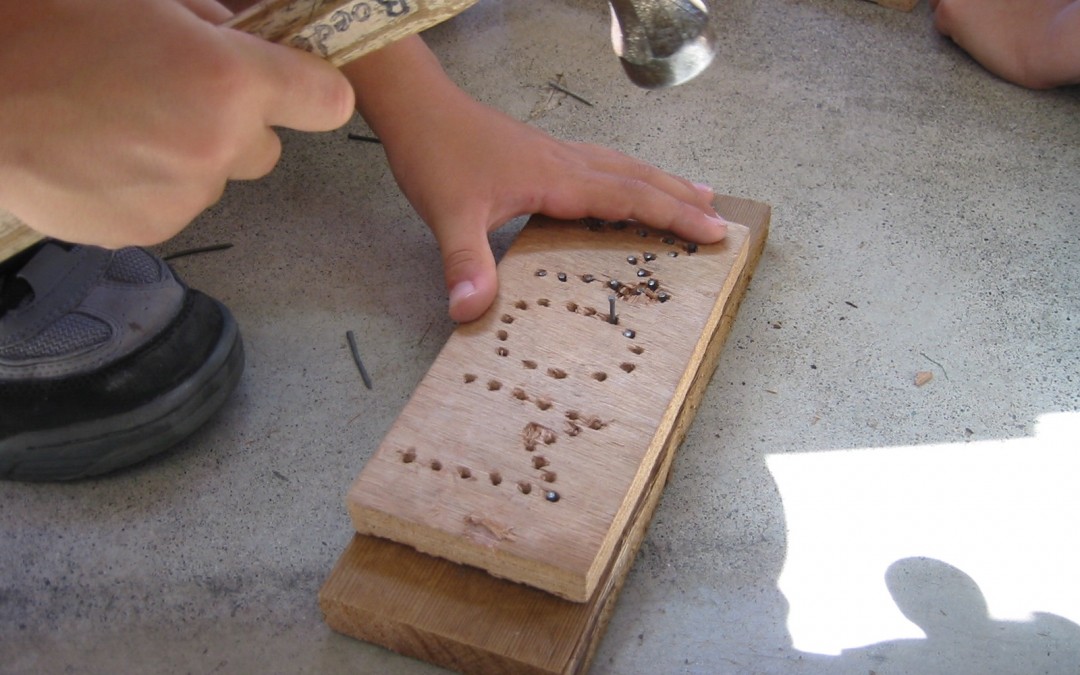
Using the “Mom” jig to make a Mom sign. That left had is a little close to where the pounding is happening.
Construction
- Choose a piece of wood a bit larger than the jig.
- Fasten the jig on top of the wood chosen for the sign by pounding the first two nails in opposite corners of the jig.
- Then the kid’s job is to pound a nail in each hole. All the nails should be pounded down so the heads are flush with the top of the jig. Bent nails should not be pounded over on top of the jig or the jig can’t be removed. If a nail starts to bend, I tell kids to stop pounding and go to the next nail. After all the nails are in I’ll go back and help pull out the bent ones.
- Pry the pattern off with the two screwdrivers. After all the nails are in, clamp the sign in the vise and gently pry the pattern using the two screwdrivers. Work around and around the jig.
- Kid can then drill two holes in the top of the sign and tie a piece of yard between the holes so the sign can be hung up.